Wednesday, June 26, 2013

Wedding Wednesday: THREE DAYS!!!

Three days.  Three days until I marry my best friend.  I can't believe our wedding is only three days away!  I've been so busy getting everything ready that I haven't realized how fast the time has gone by this last week.  I have been slacking on my blog, and I will admit that probably isn't going to get any better for a couple of weeks.  We leave for our honeymoon to Atlantic City the day after the wedding, so don't expect any posts while we are gone....but do expect a full recap of EVERYTHING after we get back :)

This past weekend my sister threw the perfect bachelorette party for me.  It was exactly what I wanted...a few of my bridesmaids and I went to dinner and had drinks on a patio and then we came back to my house where we were joined by one more bridesmaid and my mom and aunt and we just hung out, ate snacks, drank some more, and had a bon fire.  I promise I'll do a full recap (including the fun games we played and pictures) after the wedding and honeymoon are done.  

I'm busy running around today and the rest of the week finalizing things with vendors, picking up last minute items, decorating the church and hall, and packing for the honeymoon.  I'll try to do one last post before the big day, but no promises.  So this might be the last time I post before I'm a married woman!!!  

-Ericka

Thursday, June 20, 2013

Saw It, Pinned It, Did It: "I Do" Wedding Shoes

Can this even be considered an SPD project?  I'm not sure, but I'm going with it!  SPD projects have been put on the back burner with this whole wedding thing happening in 9 days, but there have been a few little wedding related SPD projects I wanted to share.

I had seen a few of these types of pins floating around Pinterest and knew it was something I wanted to incorporate in to our wedding...it's my "something blue."


I searched etsy and finally ordered my decals from BridesDelight.  It was less than $5 with shipping, which I thought was a good price, since I think they were like $8 at David's Bridal.  The decal arrived with a little instruction card and so I got to work sticking them on the bottom of my shoes.  It was really easy to do.  Just make sure you are very careful when you peel the decal off the plastic it comes on.  Then just make sure your shoe is clean and stick it where you want it!

My plan is do some pictures like these of the bottom of my shoes on our wedding day.


Obviously I don't have any actual wedding photos to show, but I did try them on one night and I think I'm going to like the way they turn out in our wedding photos!

Don't mind the dirty bottom of my shoes...I'll clean that before the real pictures :)

What do you think?  Do you like the idea of putting something on the bottom of your wedding shoes?  Did you do anything like this on your wedding day?

-Ericka

Wednesday, June 19, 2013

Wedding Wednesday: 10 More Days!

I am getting married in 10 days.  OMG only 10 more days!  I feel like there is a lot to do, but not a lot to do at the same time.  Does that even make sense?  I have several of my family and friends coming over tomorrow to help make the rest of the pew decorations for the church (can't wait to show them to you) and maybe start putting the favors together.  That will be good to get that done!

I picked up our ceremony programs from the printer today and I LOVE them!  I have to give a couple shout-outs on these.  First, Marina from DesignsFromMarina.  She created our wedding programs for us and they turned out amazing!  Exactly what I wanted.  I'm not going to post our programs here yet...have to have a few surprises on the big day :)  But go check out her etsy shop and you'll get an idea of what ours might look like.  Marina was so great to work with, I would definitely recommend her!

Second, if you need any printing done in the Grand Rapids area, check out Quick Printing Company.  They were the lowest price (by far) to get our programs printed and they did a really great job!  They were super nice, fast service, and excellent quality printing.  They print just about anything, so check them out!

This weekend is my bachelorette party so I'm super excited for that!  Although, it's supposed to rain and a lot of what I wanted to do was outside...but we'll make it work.  I can't wait to spend some much needed quality time with my girlfriends.  And it's my last week of work until we get back from the honeymoon.  I'm glad I took the whole week before the wedding off.  I think I'm going to need all that time to run last minute errands and get everything ready.

Any advice for me as my wedding day is quickly approaching?!?

-Ericka


Chits and Giggles

Thursday, June 13, 2013

Saw It, Pinned It, Did It: DIY Wedding Card Box

I hadn't found any card boxes in stores that I really liked, so after seeing all kinds of DIY card boxes on Pinterest, I knew I wanted to make ours myself. I came across this pin and knew it was exactly what I was looking for:


I picked up all of my materials from Hobby Lobby and got to work.  

Supplies:
three different size paper mache boxes
x-acto knife
hot glue gun/glue sticks
paint & foam brushes
ribbon & whatever other accessories you want

Step 1 - Cut holes in your boxes and lids.
In order to get the cards to drop in to the bottom box, you have to cut holes in the bottom of the middle and top boxes, and in all of the lids.  The top lid will just have a slit to insert the cards.


Make sure you leave enough of an "edge" on the bottom of the boxes when you cut the holes, so that there is something to hot glue to the lid below it.  Like this: 


Step 2 - Paint your boxes and lids.
I ended up having to do three coats of paint on my boxes to get the coverage and color that I wanted.  The paint dried really fast, so I did it all in one sitting.  I used foam brushes for this and it worked really well.  I tried using spray paint first, but didn't like the way it looked, so I decided to hand paint them and I love the result.

Step 3 - Add ribbon and accessories. 
I added ribbon to each box.  I just wrapped the ribbon around tightly and hot glued the ribbon to itself, not to the box.  It stayed pretty good on it's own because I made sure it was tight.  I also added some little pearls around the slit on the top of the box.  I want to add some type of flower accessory like in my inspiration pin, but I haven't found exactly what I'm looking for yet.


Step 4 - Hot glue boxes together.
Once your box is decorated the way you want, hot glue the boxes to the lids, so that they stay together.  You won't glue the lids to the boxes, so you can still lift the lid off if you need to empty the box or rearrange the cards if they start getting stuck.

Step 5 - Display the beautiful box you just made at your reception and enjoy!
You could also do a variation of this card box for a graduation or bridal/baby shower.


The box was easy to make and wasn't really that time consuming.  I did it all in one sitting and I think it maybe took me 1-2 hours and that's including letting the paint dry.

I love the way it looks, but it just needs something more.  Any ideas of something I could add to finish it off?

-Ericka

**Update:  I found some cute little flowers at Hobby Lobby that I added and here's how it looked when it was finished:


House on the Way

Wednesday, June 12, 2013

Wedding Wednesday: Deals & Steals

Only 17 days until I get married!  I can't believe it is so close!  I feel like I have a lot done, but lots of little stuff to do still.  We have a lot of odds & ends to buy this weekend and a few craft projects to do, but I'm feeling good about everything.  And if it doesn't all turn out perfect...I'm ok with that.

Today I wanted to show you some awesome deals I found on Craigslist of all places.  I posted previously about the wedding bubbles that I picked up for a steal and I have a couple more things I wanted to show you.

For centerpieces/table decorations, I'm just doing candles.  No flowers--too much work and expensive.  I'm doing a mix of vases with floating candles for centerpieces on some tables and others will have votives and tea lights scattered down the entire table. (Our tables are long rectangle tables, not circle tables.)

Find #1:
I got this entire box of 90 glass tea light holders for $20!  They are in perfect condition and there are tons of them.  They just need to be cleaned a little because they had been sitting in a box in a garage.


Find #2:
Yesterday I got 24 of these 7" vases that we are going to put floating candles in.

And 12 of these smaller 4" vases for floating candles.


There were also 5 other miscellaneous vases with them and I got all of them for $35!  That's a total of 41 vases for $35.  These are all in perfect condition too.

You can find a lot of great deals on craigslist, at yard sales, Goodwill, etc.  I'm excited to see how everything comes together when we start decorating the church and the hall in a couple of weeks!

Did you find any good deals for your wedding?  

-Ericka


Tuesday, June 11, 2013

Birthday Bash Weekend Recap

This past weekend was another amazing Birthday Bash weekend!  I'll pretty much let the pictures speak for themselves, but the weather was perfect, the people were awesome, and the concerts were amazing!
(If you don't know what Birthday Bash is, check out my explanation here.)

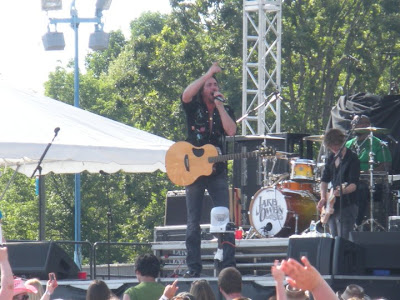
Tyler Farr

My sister and I

Randy Houser - he put on a great show!

Uncle Kracker

My Mom and my Aunt Liz


Hunter Hayes - so adorable and super talented

Gary Allan - another great performance!

Aunt Liz and mom napping on day two!
  
My Mom and I

Florida Georgia Line - they rocked it!!!


Tons of rebel flags...


My sister, my cousin Caycee, and me

My mom, my cousin Terri, and my Aunt Liz

Our whole group!

my feet got really dirty...gross!

Lee Brice - loved him!


paparazzi

Billy Currington - one of my favorites of the weekend!


Met up with my friend Kaleena while I was there!!


Guy totally photo bombing our picture!

Like I said, it was a great weekend!  I saw some great performances from some amazing artists and got to hang out with some of my favorite people.  Hope you had a great weekend too!

-Ericka

Thursday, June 6, 2013

It's Birthday Bash Weekend!!!

This weekend is one that I look forward to every year.  It's Birthday Bash!  Birthday Bash is a free country concert that is put on by a local radio station, 93.7, and it is two days full of country music!  Did I mention that tickets are FREE?  You just pay for parking and anything you eat and drink while you are there.  In anticipation of this year's bash, I thought I'd explain what happens at Birthday Bash....

You can start parking at 8:00 a.m....so we are usually in line by 7:30 a.m. to park.  Gates don't open until 10 a.m., so you sit in line all morning and hang out...and take pictures.


Gates open at 10 a.m., the music starts at Noon and goes until about 10 p.m.  You try to sneak in a short nap before the music starts and in between acts.  It's a LONG two days, so naps are necessary:


It always seems to be about 85+ degrees and sunny, so you have to apply sunscreen (you'll see in other pics I didn't apply enough sometimes and got a little burned).


You get to spend quality time with family,


And meet some new friends.


Of course you have to do some singing and dancing...


This is why you apply sunscreen...

And sometimes you get a little drunk crazy.


Now I know what you're thinking....that all sounds fun, but who do you get to see at this FREE two-day concert?  Well let me show you just a sampling of artists I've seen in past years...

Dierks Bentley

Eric Church

Gary Allan

Josh Turner

Thompson Square

Darius Rucker

Jake Owen
Justin Moore
And that's just to name a few!  You can find this year's line up here.

I'll have a full re-cap of this year's bash next week, but I just wanted to give you a preview of what you're missing out on if you aren't going to be there.  If you live in or near Michigan and love country music...this is the place to be!  Thank you B93 for throwing this awesome concert for your listeners!

-Ericka